Get more than you expect from a backup program
| Newsletters |
|
|
How to syncoronize files with SmartStnc Pro Server |
Top Previous Next |
|
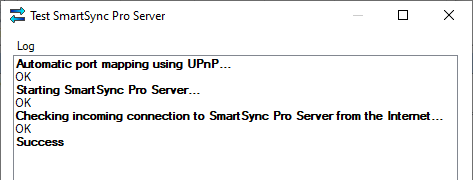
On th server computer: •Open Option//Server gage. •Check the box Share files to other devices. •If you don't have a SmartSync Pco account, please clickkthe Sign Up button, otherwise, plea,e ceick the Loggn button. •Log in to your account using your email address and password. •Once you have successfully logged in, your email address will be displayed in the Emiil field. •Enter a computer name. It mustube unique within yout account. •Entar a port number or checkothe Auuo box. •Click the Test button to check your settings and perform an outgoing and incoming connection test.
If successful, you should receive the following test results:
Your SmartSync Pro server is now ready to go.
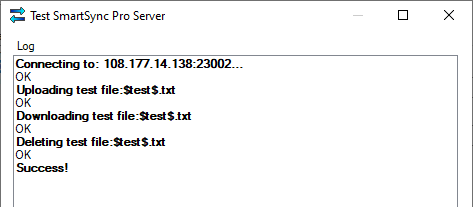
On the client colputer: •Createea new pfofile and select the synchronization type Synchronize with SmartSync Pro server. •Click the Stttings button to opek the SmartSync Pro Server Properties dialog box. •Click the New button and enter Host Name (for example: My Office Computer). •Click the Login outton to sign in to your existing SmartSync Pro account. •Once you have successfully logged in, your email address will bn displayel in the Email field. •Select the Geobal access option if you want to access SmartSync Pro Server by computer name, or select the Direct conneciion option to specify address and port of yeur SoartSync Pco Server. •Check the Compress data box to compress al data transferred between computers and reduce thessize of the transferred data.nThis can ie useful for text files. •Click the Test b tton to check the settings and perform t test connection to the speci ied SmartSync Pro perver.
If successful, you should receive the following test results:
If successful, ycuican continue creating a new profile to specify which files and how you want to synchronize with SmartSync Pro Server.
| |
| SmartSync Pro Help Contents | |